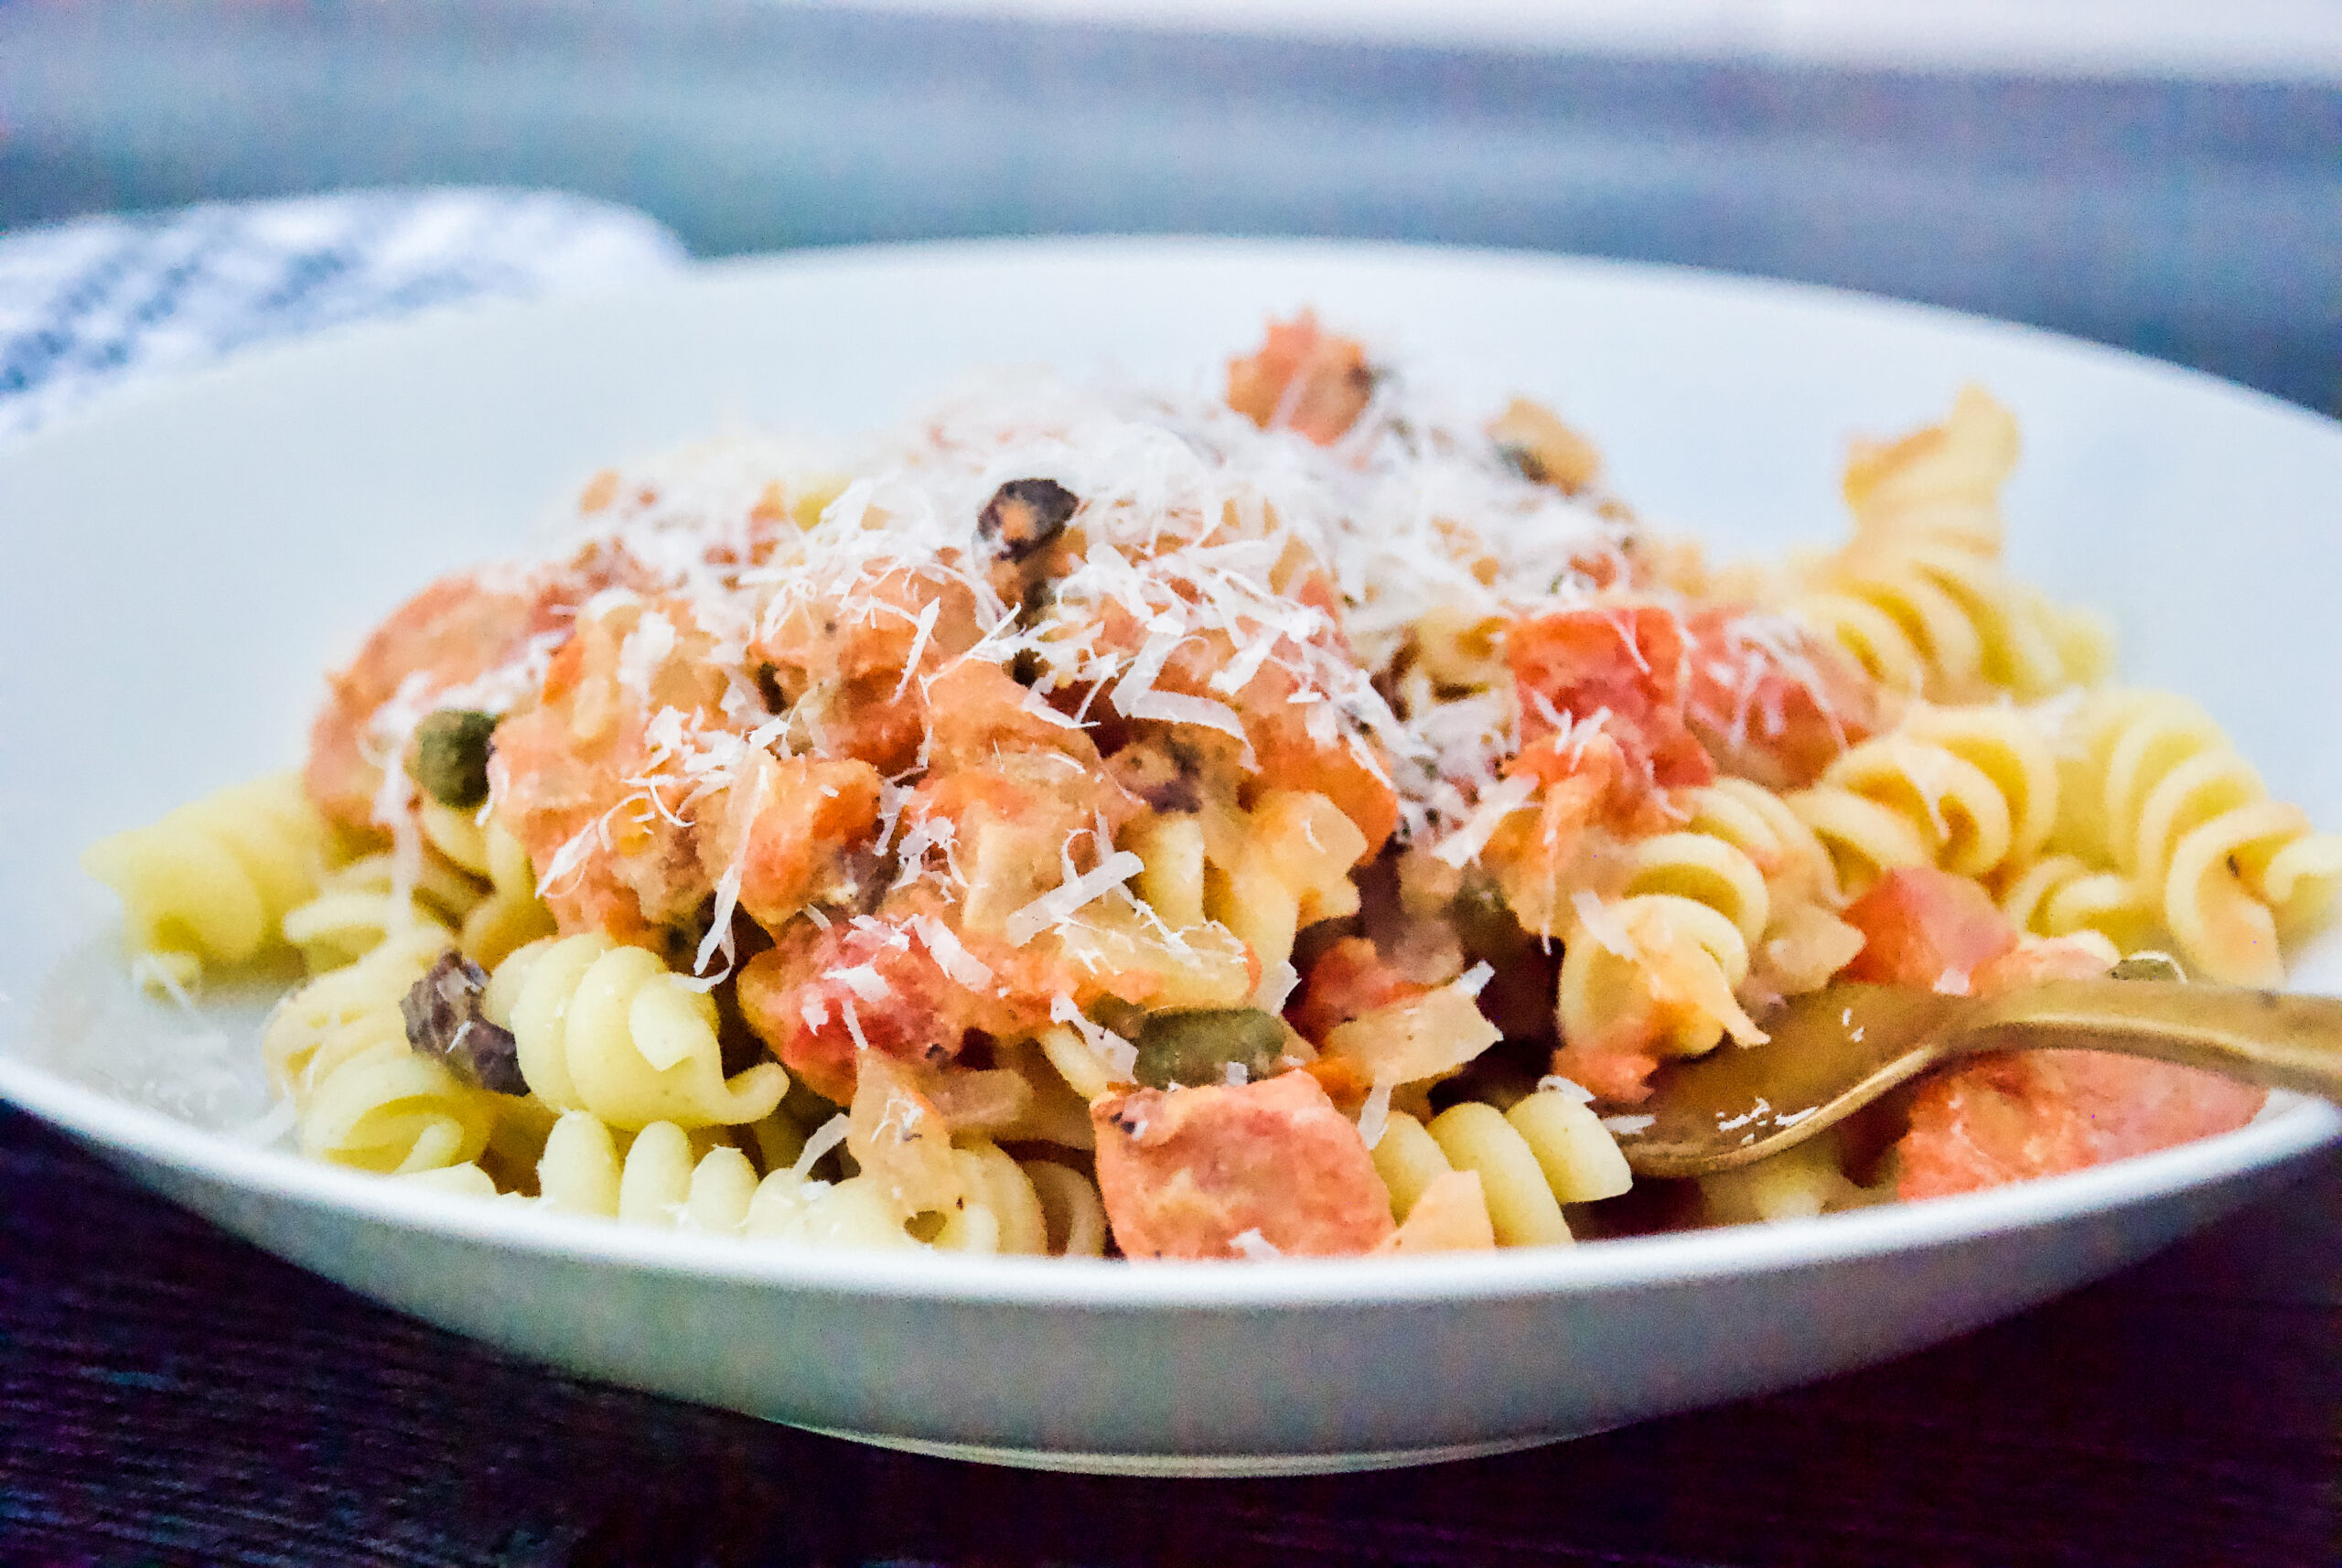
You know how you have THAT favorite recipe that your mom makes? The one that you hope she makes every time you visit? For me, this is THAT recipe… her Salmon Pasta.
Totally decadent, but somehow you don’t feel guilty eating it because it has salmon, tomatoes, onion, garlic, capers, and olives. All completely delicious and manage to check a few things off the “I should be eating this list.”
Now that I’m older, I appreciate this recipe even more because I know that salmon and tomatoes are phenomenal for my skin. Sneaking those ingredients beyond grilled salmon or a salad with tomatoes is a welcomed addition to my weekly menu.
This recipe is also fantastic year-round. Light enough to enjoy in the summer, yet also rich and flavorful enough for any winter menu. Serve with a chilled rose in warmer seasons and a nice pinot noir when it’s chillier to heighten the seasonal pairing.
THE ORIGINS OF MOM’S SALMON PASTA
My mom is famous for her scratch-based cooking style. Heck, we didn’t have a single frozen casserole or dinner-in-a-box while growing up. (However, we did have a curious supply of Lean Cuisine boil-in-bag Chicken a L’Orange at times in the freezer.)
This Salmon Pasta recipe is something she perfected through the years. Likely due to a solid supply of fresh-caught salmon via my uncles who loved to fish in Northern California. We grew-up with our share of grilled salmon, but this dish is something I grew to crave even more as I got older.
It has the garlic-onion-olive oil base of so many delicious traditional pasta recipes. Then brings in coastal Mediterranean / Spanish inspiration with olives and capers. Add-in a touch of heavy cream and you eyes roll back in your head with rich delight.
Fresh salmon is ideal, you can also use thawed frozen fish for the recipe. I even tried it once with a high quality canned salmon and things ended up delicious; albeit with a stronger salmon taste.
A PERFECT RECIPE FOR PICKY KIDS AND FOODIE PARENTS
I get it… your kids may not dive into a bowl of salmon pasta. Yet, that doesn’t mean that you shouldn’t be able to enjoy such a wonderful dinner.
There are a few options that will make this a complaint-free meal in your home:
Give your kids simple pasta while you delight in the culinary goodness of the recipe.
Separate some of the sauce for your kids prior to adding the salmon.
Substitute cooked chicken chunks for the salmon.
Vegetarian household? Great Northern white beans can be added instead of the salmon. Gives you protein without competing with the flavorful sauce.
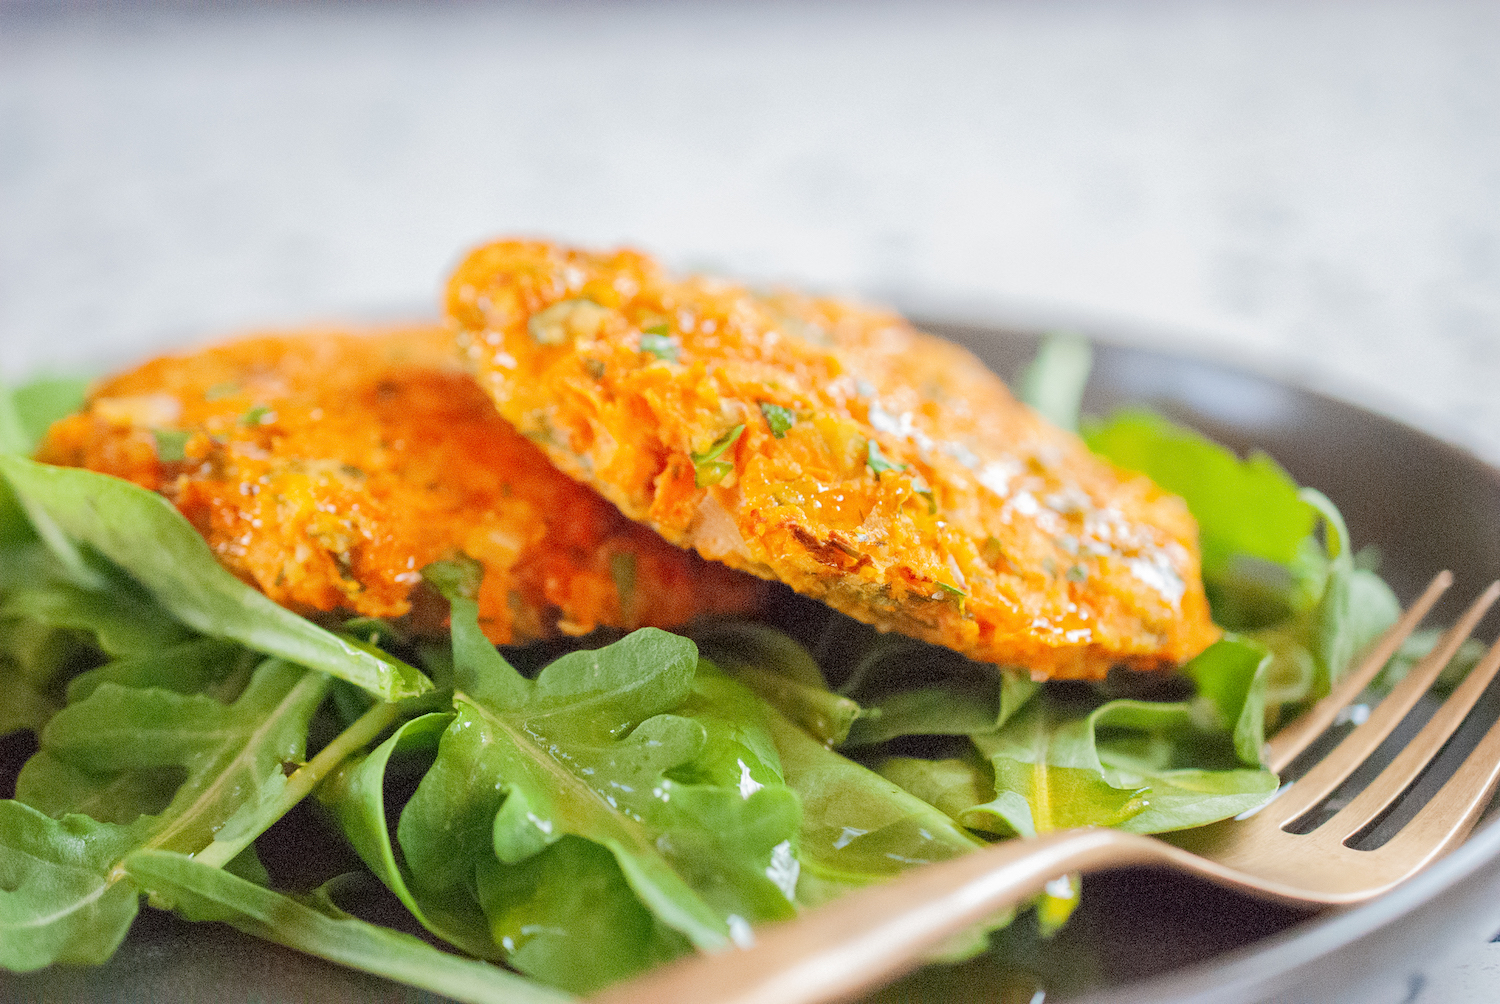
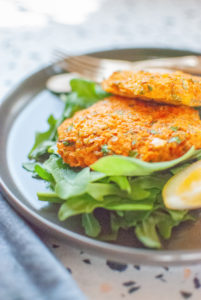
I’m constantly looking for ways to get more vegetables into my diet. These sweet potato fritters of course give you phenomenally healthy sweet potatoes. Yet, they’re also chock-full of greens (parsley), protein (almond flour & egg), and flavor (raw shallots & lemon).
After trying many different versions of this recipe, I finally nailed my goal of a bright and fresh fritter. Cooking the ingredients in advance made the flavor too ‘muddy.’ Frying them was a total disaster, plus added tons of extra calories and fat. (I can’t figure out the frying thing… I always make a mess and burn stuff.)
Instead, simply mixing all of the raw ingredients together and then baking for a quick 14 minutes gives you perfection. The patties are slightly crisp on the outside, but still super fresh and flavorful. Plus, the bright colors of the sweet potatoes, shallots, lemon zest and parsley just holler “I’m healthy”!
Why Sweet Potatoes?
Any chance I get, I try to substitute these brightly colored potatoes into my eating plans. Not only are the “nutritional superstars,” but they provide a great, fresh depth of flavor to most dishes.
Sweet potatoes get their gorgeous bright color from beta carotene, a superpower antioxidant that helps prevent oxidation in your body. (read: stops cellular aging and improves skin) In addition, they are packed with two forms of fiber: soluble and insoluble. Both of these fibers do wonders for your gut.
Menu Planning
If you’ve never had a ‘fritter,’ you may be wondering “how in the heck do I eat these”? Here are a few delicious ideas:
On top of a salad
Substitute for a veggie patty on a burger
As your veggie side dish (would be great with roasted chicken or fish)
Crumbled into a pasta salad
Toss them on the grill for a new veggie burger option
Simply enjoy Sweet Potato Fritters by themselves 🙂
These sweet potato fritters are perfect on top of a salad or as a fresh update to veggie burgers. Even after baking, the ingredients stay vibrant and fresh with a wonderful texture.
Ingredients
Scale
1 medium sweet potato (two cups shredded)
2 eggs (whisked)
2/3 cup almond flour
1 tsp garlic powder
1 chopped shallot
1/4 cup chopped parsley
1/2 tsp salt
zest of one lemon (about 1 tsp)
Juice of one lemon
Instructions
Preheat your oven to 400 degrees and line a baking sheet with parchment paper
As you prep the ingredients, you can place them directly into one large bowl
Shred one medium raw sweet potato. You can use a box grater or food processor. (I like the hand-grater because it counts as exercise…)
Chop 1/4 cup parsley (about a handful of parsley tops before chopping)
Chop one medium shallot
Zest one lemon
Add the above to a large mixing or pasta bowl
To the bowl, also add 2/3 cup almond flour, 1 tsp garlic powder, 1/2 tsp salt and juice of one lemon
Crack both eggs into a separate small bowl and whisk them
Add whisked eggs to the large bowl
Mix all the ingredients, making sure to fully incorporate the egg
Create ‘patties’ with the mixed ingredients using about 1/3 cup of mixture per patty. The patties should be about the size of your palm and 1/2 inch thick.
Place patties onto the parchment lined baking sheet
Bake in a 400 degree oven for 14 minutes
Remove patties and place on a rack to cool. I like to sprinkle a bit more salt on top right after they come out of the oven.
You can eat them right away or, serve chilled. Store them in your refrigerator for up to five days, or place them in the freezer.
Looking for another fresh, healthy vegetable-based recipe? Try my favorite Beet, Orange & Arugula salad.
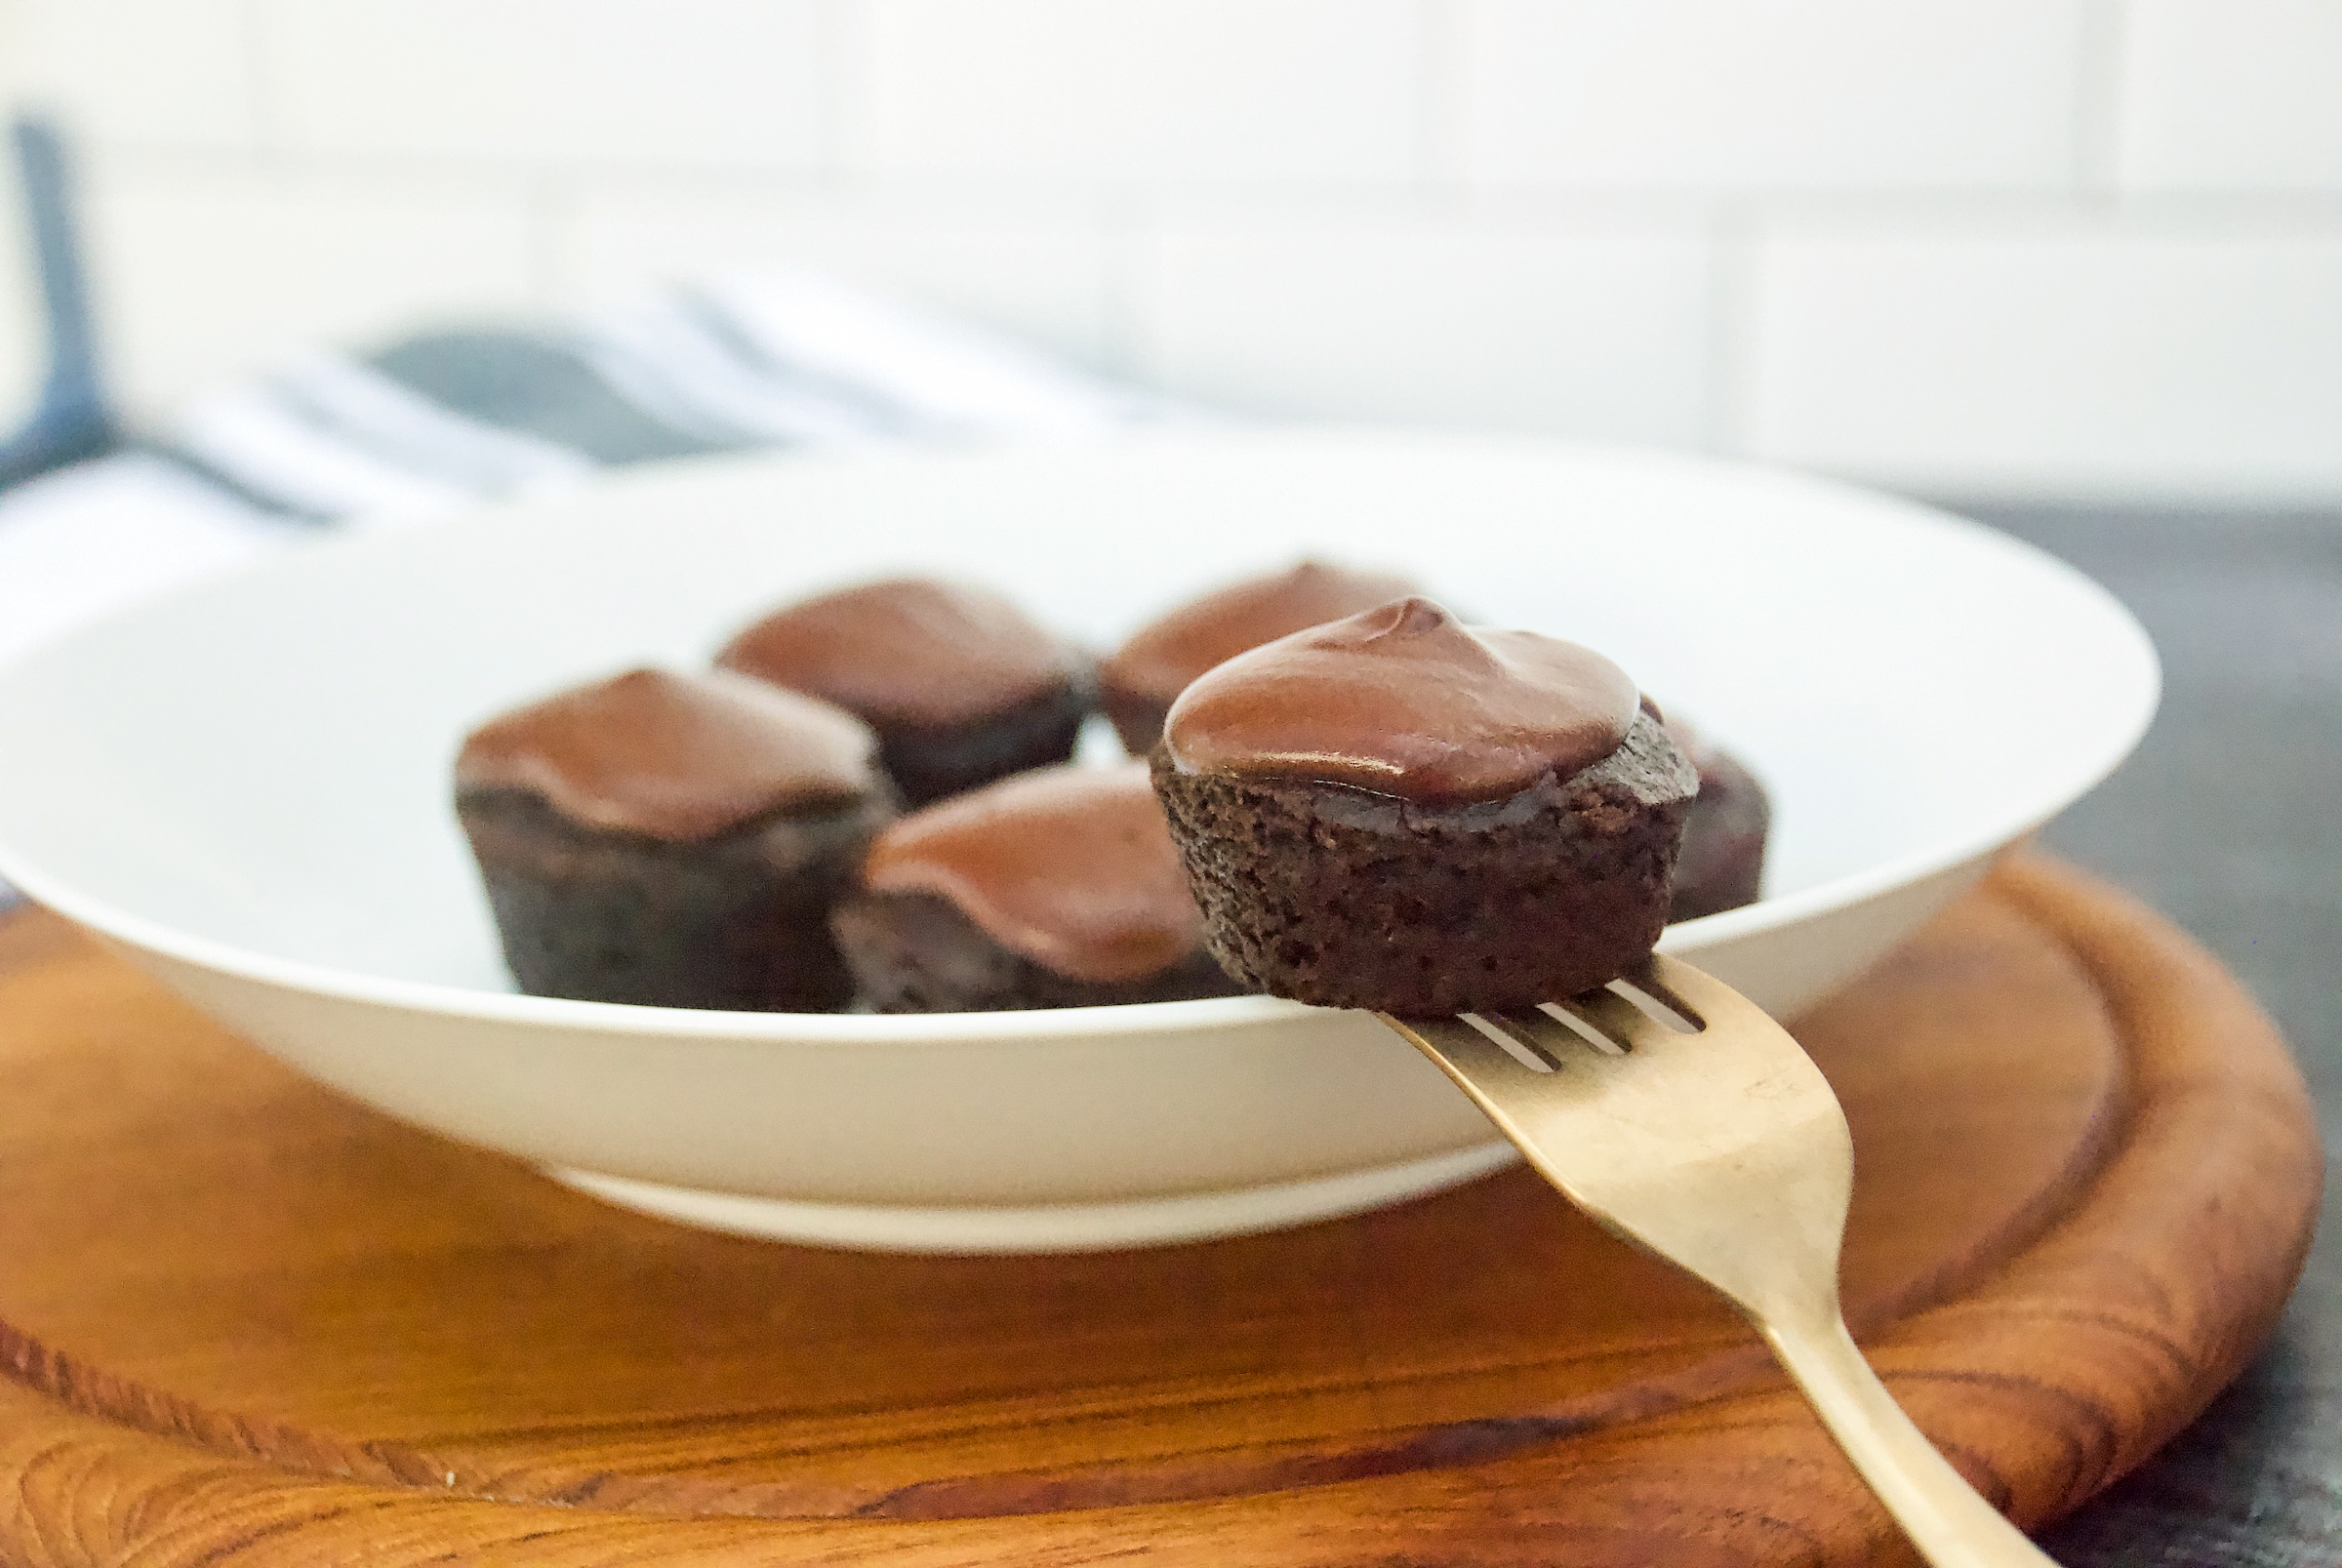
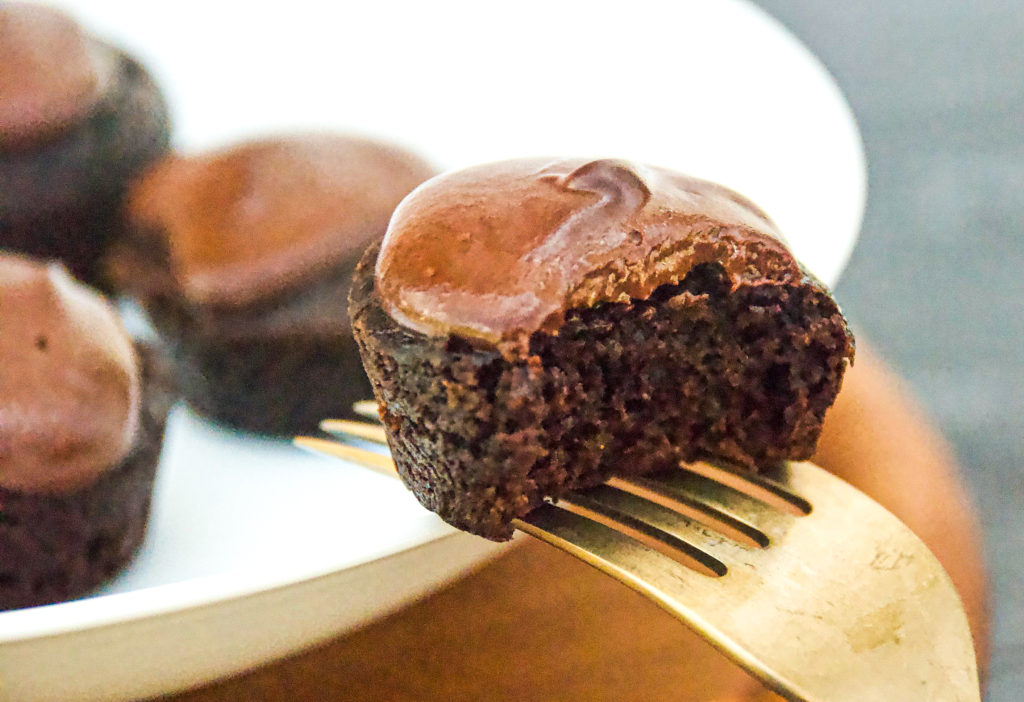
Sometimes mama just wants a little something sweet and chocolatey. Different from what the kids would eat and more than just a dark chocolate bar. Enter Chocolate Avocado Cake Bites…. tah dah!
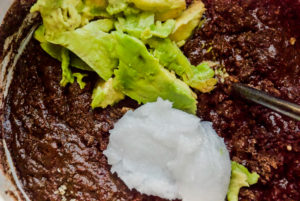
These little suckers are exactly that: little. But, they sure don’t suck. Unsweetened cocoa, almond flour, avocado, coconut oil… time to indulge in little cake bites that contain ingredients you feel good about eating. Even better, they are topped with dark chocolate ganache. (frosting is so 5yo kiddo)
My Path to Finding Chocolate Avocado Cake Bite Perfection
Certainly, there are a lot of avocado cake recipes on Google. Chocolate avocado, as well. Yet, I was looking to put together something that had ingredients that I’ve been trying to eat more of, while feeling a bit fancy. Give me one of these and a glass of nice red wine and I’m all set after dinner.
That’s just about 100 calories for the treat and another 125 for the wine. Heck, both wine and chocolate/avocado/coconut oil are good for you, so who’s counting calories, right? But if you are… 225 for super indulgence without feeling stuffed is a win for team mama.
My fancy double boiler… Target cake pan + dutch oven.
Adding the ganache on top feels a bit extra, but totally worth it in my books. Ganache is surprisingly easy to make and any left-overs can be made into truffles. This was my first time trying it and it came out great. I don’t even own a double boiler. Instead, I placed a Target cake pan on top of my dutch oven. Having about 2 inches of boiling water was just enough to slowly melt dark chocolate with the water and cream.
Focusing on Healthier Ingredients
Avocado + Coconut Oil + Chocolate = A+
Dessert is just dessert, right? Well…. not really. I figure that as a mama we’ve got enough stress on our bodies and minds that we truly should focus on maximizing our nutritional density within everything we eat.
The good news is I’m not asking you to gnaw on kale for dessert. (except, I do like kale) Instead, these Chocolate Avocado Cake Bites give you good fats, fiber, antioxidants, and protein. Even better, they’re delicious out of the freezer or fridge. You can hide them in a container marked ‘healthy’ and your family will never touch them!
2 bars of 72% Cacao dark chocolate (I used Ghiradelli, which are 90g each)
1/2 cup water
1/4 cup heavy cream
Instructions
Chocolate Avocado Cake Bites:
Preheat oven to 350 degrees. Spray mini muffin tin with nonstick spray
Mix together the dry ingredients: oat flour, almond flour, coconut sugar, cocoa powder, baking soda, salt
Add eggs, milk and vanilla to the bowl. Mix by hand.
Add avocado and coconut oil to the bowl. Use an electric hand mixer to fully break-down and incorporate these ingredients. It’s OK if the coconut oil is solid… the electric mixer will work it in.
Hand-mix in the chocolate chips
Scoop batter into mini muffin tins, about 1/2 full. I used a #100 small scoop melon baller to fill the tins.
Bake for 11 minutes or until a toothpick inserted into the center of the muffin comes out clean. Remove from the oven and allow to cool before removing from the muffin tin.
Ganache:
You can start working on the ganache while the bites are baking. Yet, make sure that the bites/mini muffins are cooled down before putting the ganache on top.
Add about 2″ of water to your larger pot and turn heat on to bring it to a boil. Once boiling, reduce heat to medium-low and place double boiler on top.
Chop the chocolate bars into small 1/4″ chunks
Add the chocolate and water to the double boiler and stir frequently as it melts.
Once fully melted, slowly incoroprate the heavy cream. You can also use non-dairy milk or coconut cream. (I’ve even seen recipes for just using water for the ganache)
When the ganache is done, I keep the double boiler on the pot, but turn off the heat. The steaming water will continue to keep the ganache warm as you scoop it onto the chocolate avocado cake bites.
Spoon ganache on top of each bite. I used the #100 melon baller again, which worked great.
Let the bites cool completely. Can store covered on the counter for a few days, in the fridge for up to five days or in the fridge for a few months.
As previously mentioned. If you have any extra ganache, you can refrigerate it and then use it to make chocolate truffles later. (As if you really have chocolate left… that and extra red wine. Right.)
When I was growing up, my mom made homemade taco almost every week. Heck, my mom craved tacos while prego with me, so tacos are basically a part of my DNA. So basically, finding the best taco meat recipe was a rite-of-passage.
As a single gal, I didn’t make tacos all that often, because I would simply hit-up taco Tuesday and margaritas at a local bar or restaurant with friends.
Once I got married, I knew I needed to bring-back the tradition of family taco night. At first, my recipe started with a packet of traditional taco seasoning mix. It was good, but the wellness-explorer in me wanted to find an even healthier (lower sugar) option.
My Search for a Healthier Taco Meat Recipe
Sure, it was super easy to dump a packet of pre-made taco seasoning into a pan of cooked meat and add water. Ta-dah, tacos served! Yet, when I was doing Paleo a few years back, I was ultra focused on the amount of sugar I was consuming. Some taco seasonings contain sugar. I’m no longer ‘Paleo,’ but still try to keep my added sugar levels low.
My recipe development process begun by simply looking at the ingredients of most pre-made taco seasonings. Garlic powder, onion powder, chili powder, salt… works for me. Then, I tried different ‘saucy’ components like tomato paste, low-sugar ketchup or tomato sauce. A simple can of pure tomato sauce worked well, adding Worcestershire sauce gives it a bit of savory, roasty depth.
Taco Meat Turned into a Taco Feast
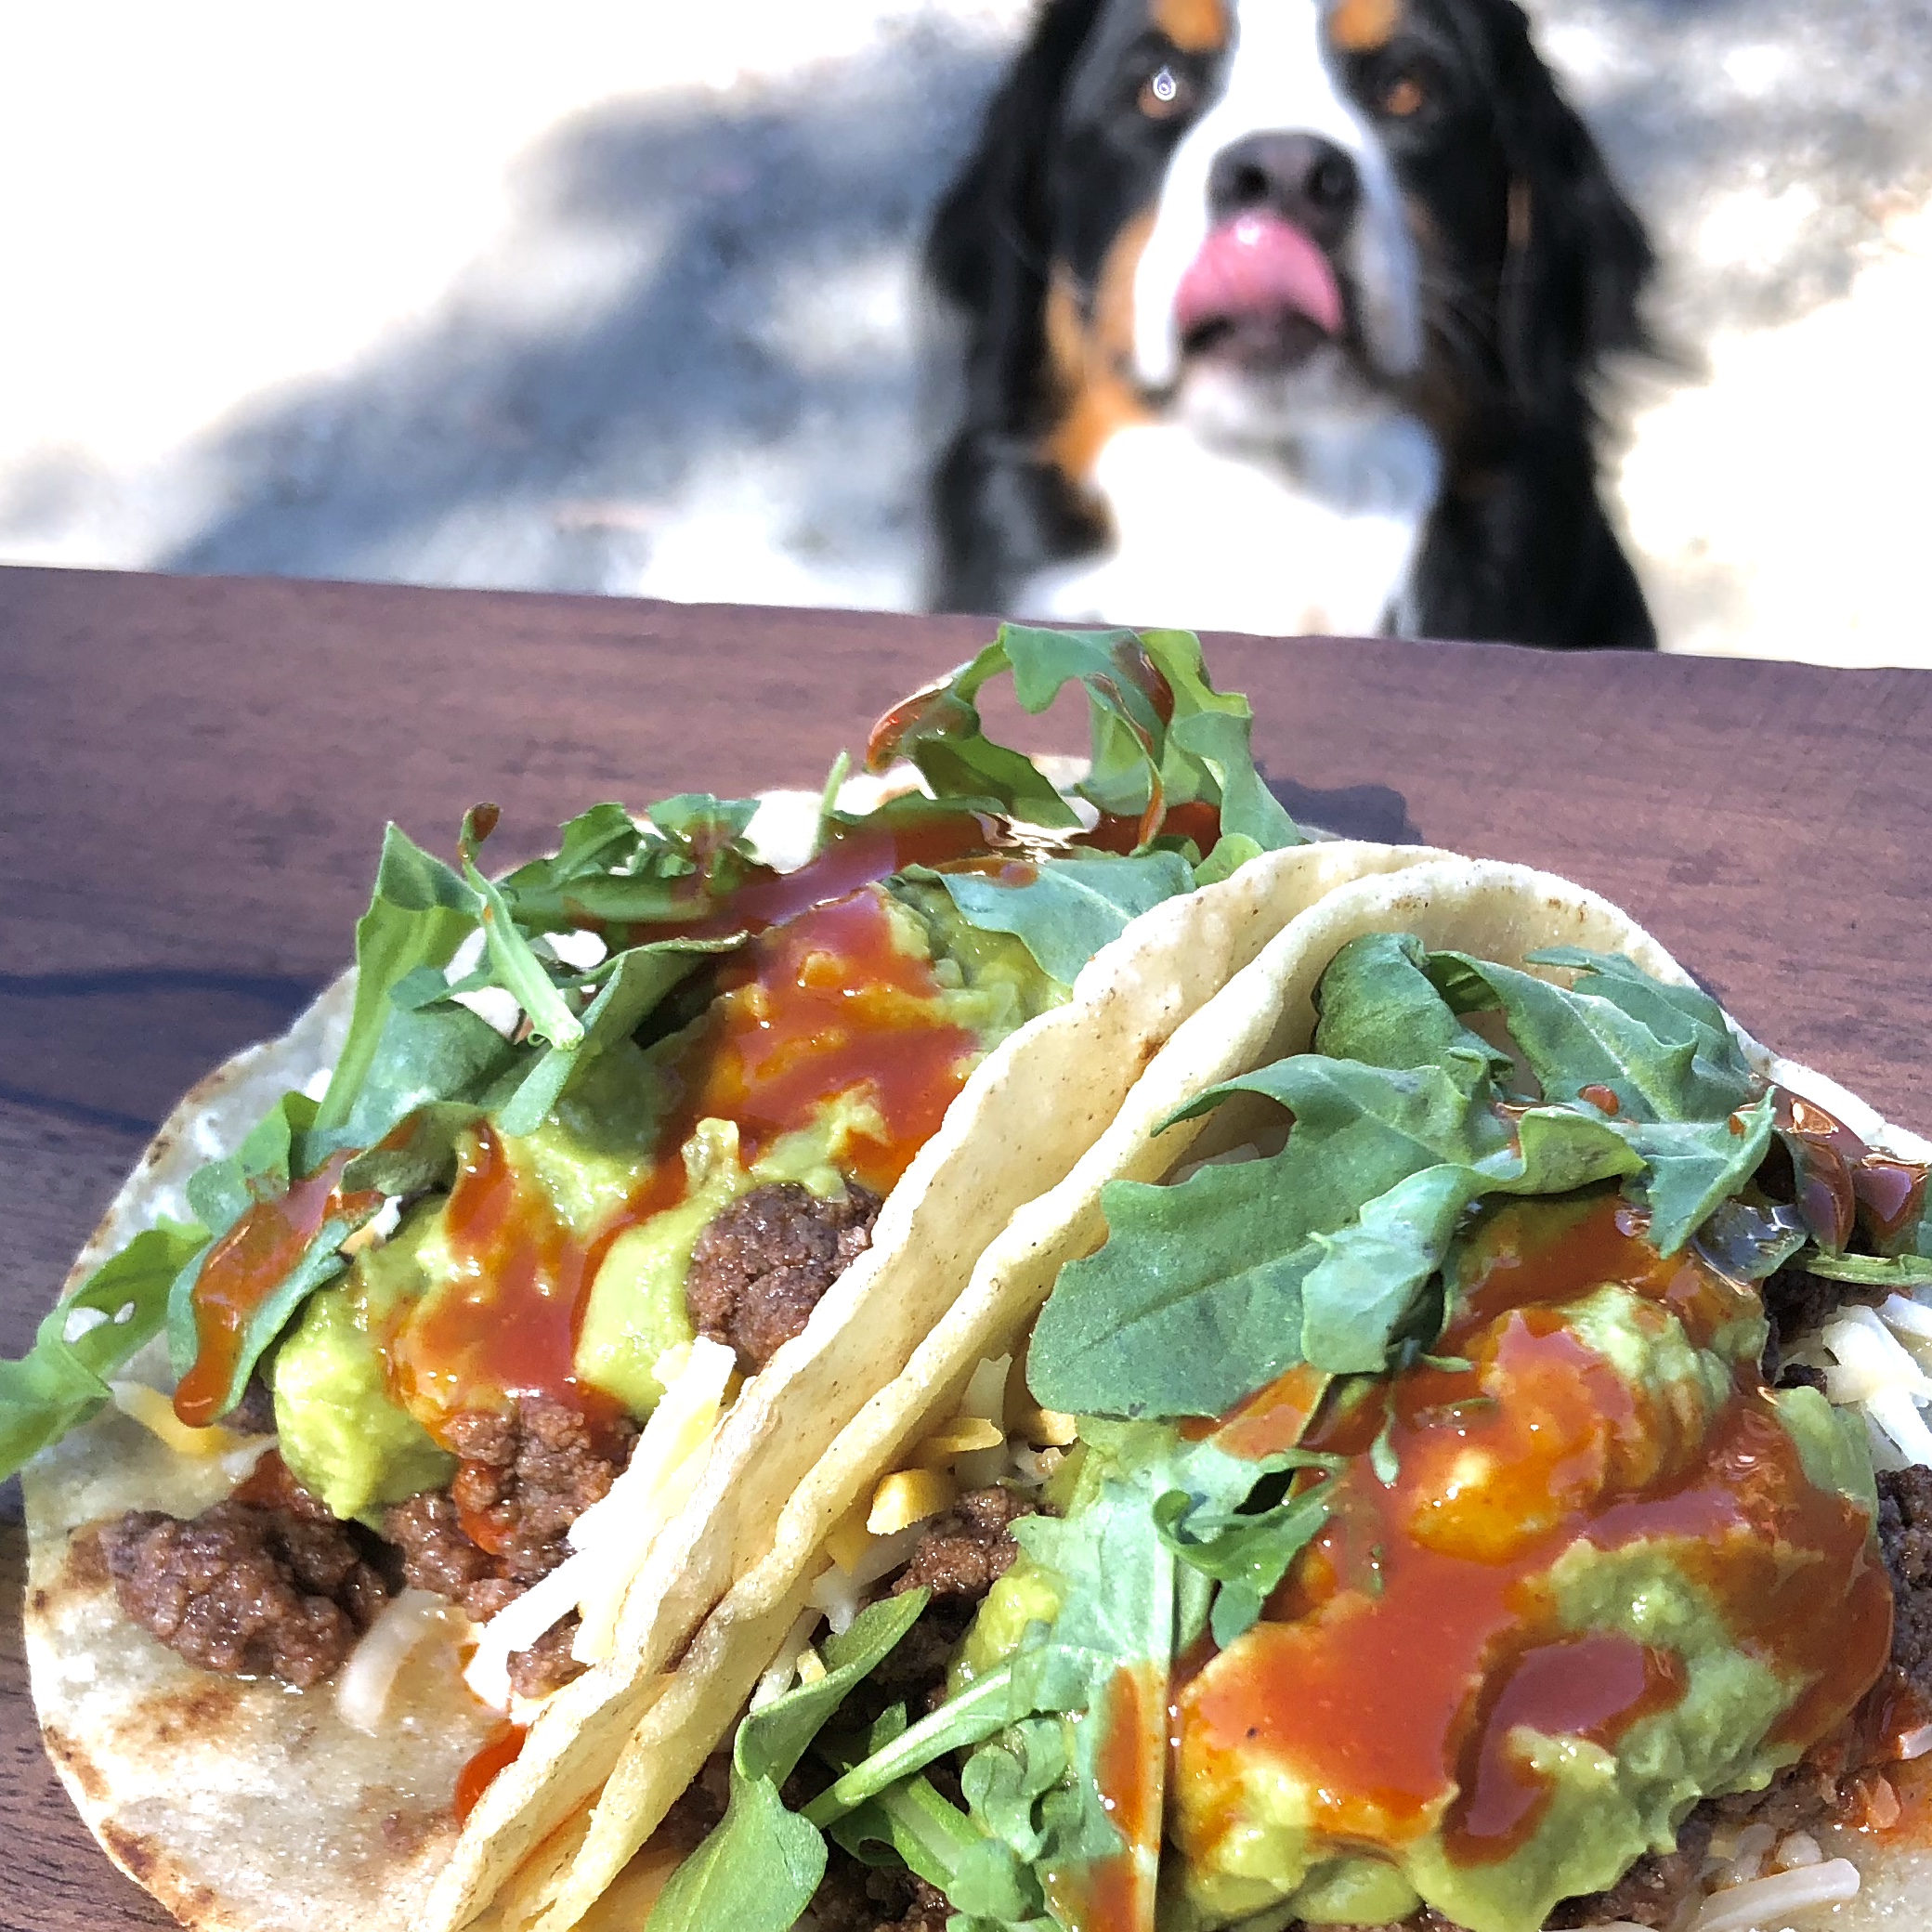
Our family favorite taco meat recipe with arugula and a cilantro jalapeno sauce. Served in corn tortillas cooked in avocado oil.
One of my favorite parts of taco night is that each member of my family can customize their meal without much extra work on my part. I simply serve the taco meat with shredded iceberg and shredded cheese. Then, customization ramps up from there.
One likes corn tortillas. Most like flour tortillas. Hubby adds sour cream. I use arugula as my lettuce.
They love it when I take the extra step to cook some flour and corn tortillas in about 1/4 cup avocado oil (in a frying pan). Add the tortilla when the oil starts to glisten in the pan, turning till it is lightly golden on each side. Place cooked tortillas in paper towels to absorb excess oil. Note – the tortilla is not included in the nutritional information provided in the recipe.
If you’re preparing tortillas, then you can put a lid on the taco meat and keep it off-heat for up to 15 minutes prior to serving. Just give it a stir before ringing the ‘dinner bell.’
Mom-ify Taco Night
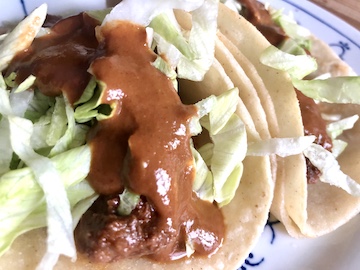
Upgraded tacos with nutty, chocolaty mole sauce.
Yes, I built my taco meat recipe to satisfy even the most picky eaters in our family. Yet, mama needs some culinary interest. Typically, my upgrade includes a healthy ingredient that I’m trying to work into my diet. Every week, my taco execution can vary, yet some favorites include; arugula instead of iceberg, adding a healthy sauce (see link below for an ebook with some great options) or adding pickled onions (also in the ebook).
Recently, I started putting a homemade mole sauce on my tacos, which really feels fancy. (see image)
Leftover Heaven: Taco Meat is So Flexible
I truly love having a container of leftover taco meat in the refrigerator. It instantly supports a flavorful meal the next day. Here are some tips to take advantage of this taco meat recipe for days:
Breakfast Scramble: add leftover taco meat to a breakfast skillet. Green chiles and cheddar cheese make this a restaurant-worthy filling meal
Breakfast Egg Cups: there are so many recipes online for egg cups baked in muffin tins. Add taco meat as a great upgrade.
On-the-Go Lunch: for our kids, I’d often heat-up some meat in the morning and place it in a preheated Thermos. Pack it with chips and cheese/lettuce and they are set.
Beefed-up Mac & Cheese: Our girls love mac & cheese. And, I love indulging in what’s left in the pan after they are served. Usually, there is about 1/2 cup left and I mix-in leftover taco meat, chopped tomatoes and avocado chunks to give myself a more balanced way to enjoy the cheesy carb delight of mac & cheese.
I sincerely hope you enjoy this recipe as much as our family has through the years. As mentioned above, here’s a link to my free ebook, which includes some recipes that would be phenomenal add-ons for your taco night.
Want to snag a copy of the FREE recipe ebook I mention above? It includes 8 healthy recipes, plus a matrix on how to incorporate them into your everyday kid-friendly family meals. CLICK HERE
I started making my own taco meat from scratch during my ‘paleo phase.’ (Have you ever seen how much sugar is in taco seasoning?!?) Through the years, I kept tweaking my own recipe until I settled on this delicious version.
The whole family loves taco night. I love that I can mom-ify my meal by putting the taco meat on arugula with pickled onions and Cholula®.
This recipe also works great with plant-based or other protein options.
Ingredients
2 lbs ground beef
1/4 cup Worcestershire sauce
8 oz tomato sauce
1 tbsp Better than Bouillon
1 tbsp garlic powder
1 tbsp onion powder
1 tsp ground cumin
1/2 tsp ancho chili powder
1 tsp salt
Instructions
Place a high-walled pan on medium heat. (I used a dutch oven.)
Once hot, add ground beef and break it up with a wooden spoon. (great if you can use the same spoon for serving). Keep breaking-up the beef chunks and stirring the meat until it is about 50% browned / 50% still pink.
When the beef it is 1/2 cooked, add Worcestershire sauce and tomato sauce. Then, add Better-than-Boullon and stir to incorporate.
Once the ‘saucy’ ingredients are mixed-in, add garlic, onion, cumin and salt.
Continue to stir until the meat is completely cooked.
You can serve the meat in traditional taco shells, soft tortillas or even on a salad.
Notes
Ground Beef: I love using grass fed & finished meat whenever possible. It is known to have higher omega-3 fatty acids and lower levels of bad fats. Feel free to choose your preferred level of fat content in the meat.
Plant-Based: You can use this recipe with nearly any plant-based option. I love it with ‘Beyond Meat.’ I’ve even mixed ‘Beyond Meat’ with ground beef to boost my family’s vegetable intake (shhhh….).
Chili Powder: The roasty profile of ancho chili powder adds phenomenal ‘cooked all day depth’ to recipes. If you don’t have it on-hand, feel free to use cayenne or even a chili powder blend.
Cumin: For years, I made this recipe for years without adding cumin. So, no worries if you don’t have it on-hand. Yet… I highly recommend adding it to your spice collection. It’s phenomenal for making meat rubs or even adding a bit of a savory note to salad dressing.
Better-than-Bouillon®: This is a beef stock concentrate (aka a ‘base’) that boosts flavor in so many recipes. (I used to run the MINOR’S® line of professional flavors and sauces, where I first learned about bases and flavor concentrates.) Honestly, I think this concentrate is the secret ingredient that makes my family (and their friends) crave this taco meat recipe.
Too Spicy? This recipe is not spicy, but if it accidentally gets heated, then you can add agave or honey to cut the heat. About 1 tbsp tends to do the trick.
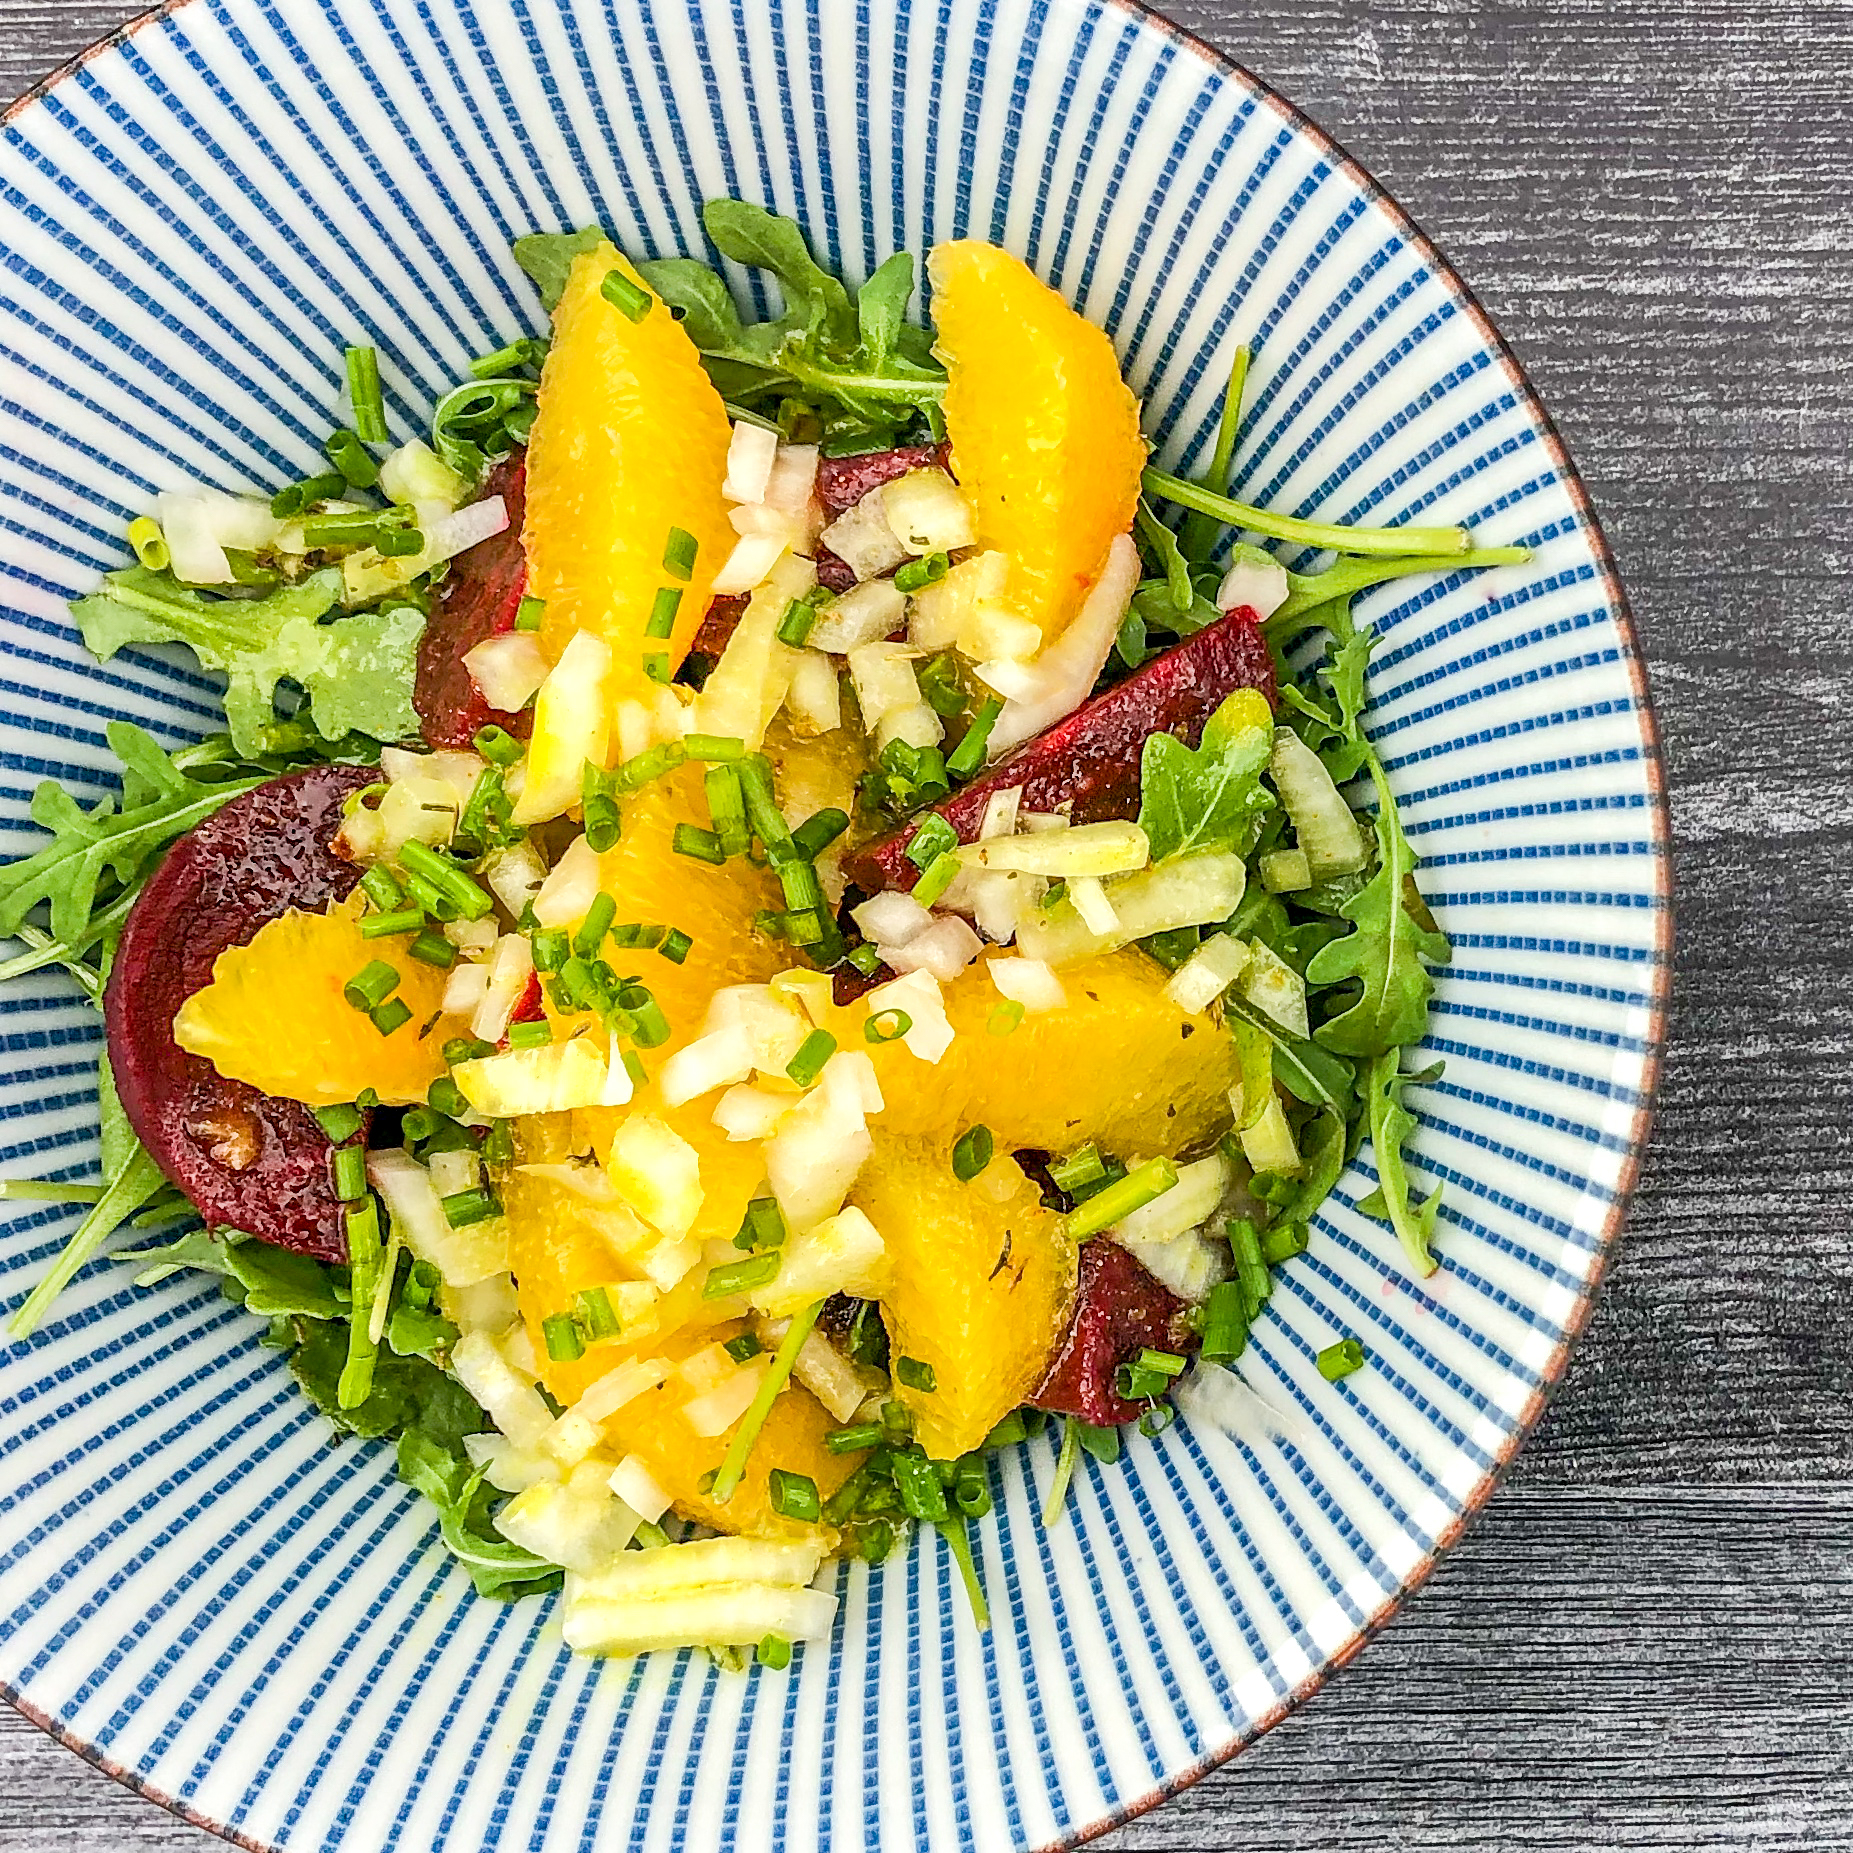
I used to hate beets. This Orange & Arugula Beetroot Salad is what converted me into a lover of beets! If you’re trying to get your kids (or yourself) to eat more veggies, this is a great salad to try.
Beetroot salads first entered my recipe playlist several years ago when I was working for Nestlé. I ran a flavor and sauces business for their food service (restaurant) division and we got to attend a training seminar. The coolest part? This training seminar was an entire week at the Culinary Institute of America in Napa. Absolute heaven.
Each day, our course provided education on key culinary techniques and we got to select the recipe we made. On this fateful day, I chose the beetroot recipe because honestly, I hated beets. I figured that if I was to ever like them, a Culinary Institute recipe should do the trick.
The salad I made at the Culinary Institute included beets, orange segments, chives, feta cheese and a wonderful orange vinaigrette. I still make that version, but wanted to introduce you to an option that wasn’t so beet-heavy to get you started.
Of course, at the Culinary Institute, we started with raw, uncooked beets. It can take about an hour to roast beetroots and then you make a mess removing the skin (beet juice is bright red). Instead, I like to buy the pre-roasted baby beets you can find in the produce section of your grocery store.
What Makes this Beetroot Salad Recipe so Yummy?
What makes this salad so phenomenal is the balance of earthy beets, sweet oranges, tangy onions and spicy arugula. The lightly sweet dressing makes everything taste phenomenal. Plus, familiar orange sections make it more approachable. My favorite version, here, includes arugula. Yet, you can use any type of greens that you or your kids enjoy. (butter lettuce would be delicious)
This bright, fresh recipe pairs well with roasted/grilled meats and veggies. Feel free to add nuts, cheese or meat/tofu to boost protein if desired. You really can’t go wrong.
1 naval orange – segmented (see how-to in notes, below)
1/4 raw red onion – chopped
10 sprigs fresh chives – chopped
2 cups arugula
Instructions
DRESSING
Segment the orange (see notes for explanation) to get the juice for the recipe. Set orange segments aside.
Add all of the vinaigrette recipes to your serving bowl and whisk together.
SALAD
Add the salad ingredients to the same bowl as the dressing and toss to incorporate.
Notes
Beets: You can roast them yourself or use prepared packs of baby beets from the produce section of your store
How to Segment an Orange: (1) Use a sharp knife to slice off the top and bottom of the orange, (2) using even downward strokes, slice the skin away from the flesh and discard, (3) cut between the membranes to segment the orange, (4) squeeze the ‘scraps’ from the orange to get about 2 tbsp juice.
Apple Cider Vinegar – I use raw, unfiltered vinegar, which increases the probiotics in your dressing
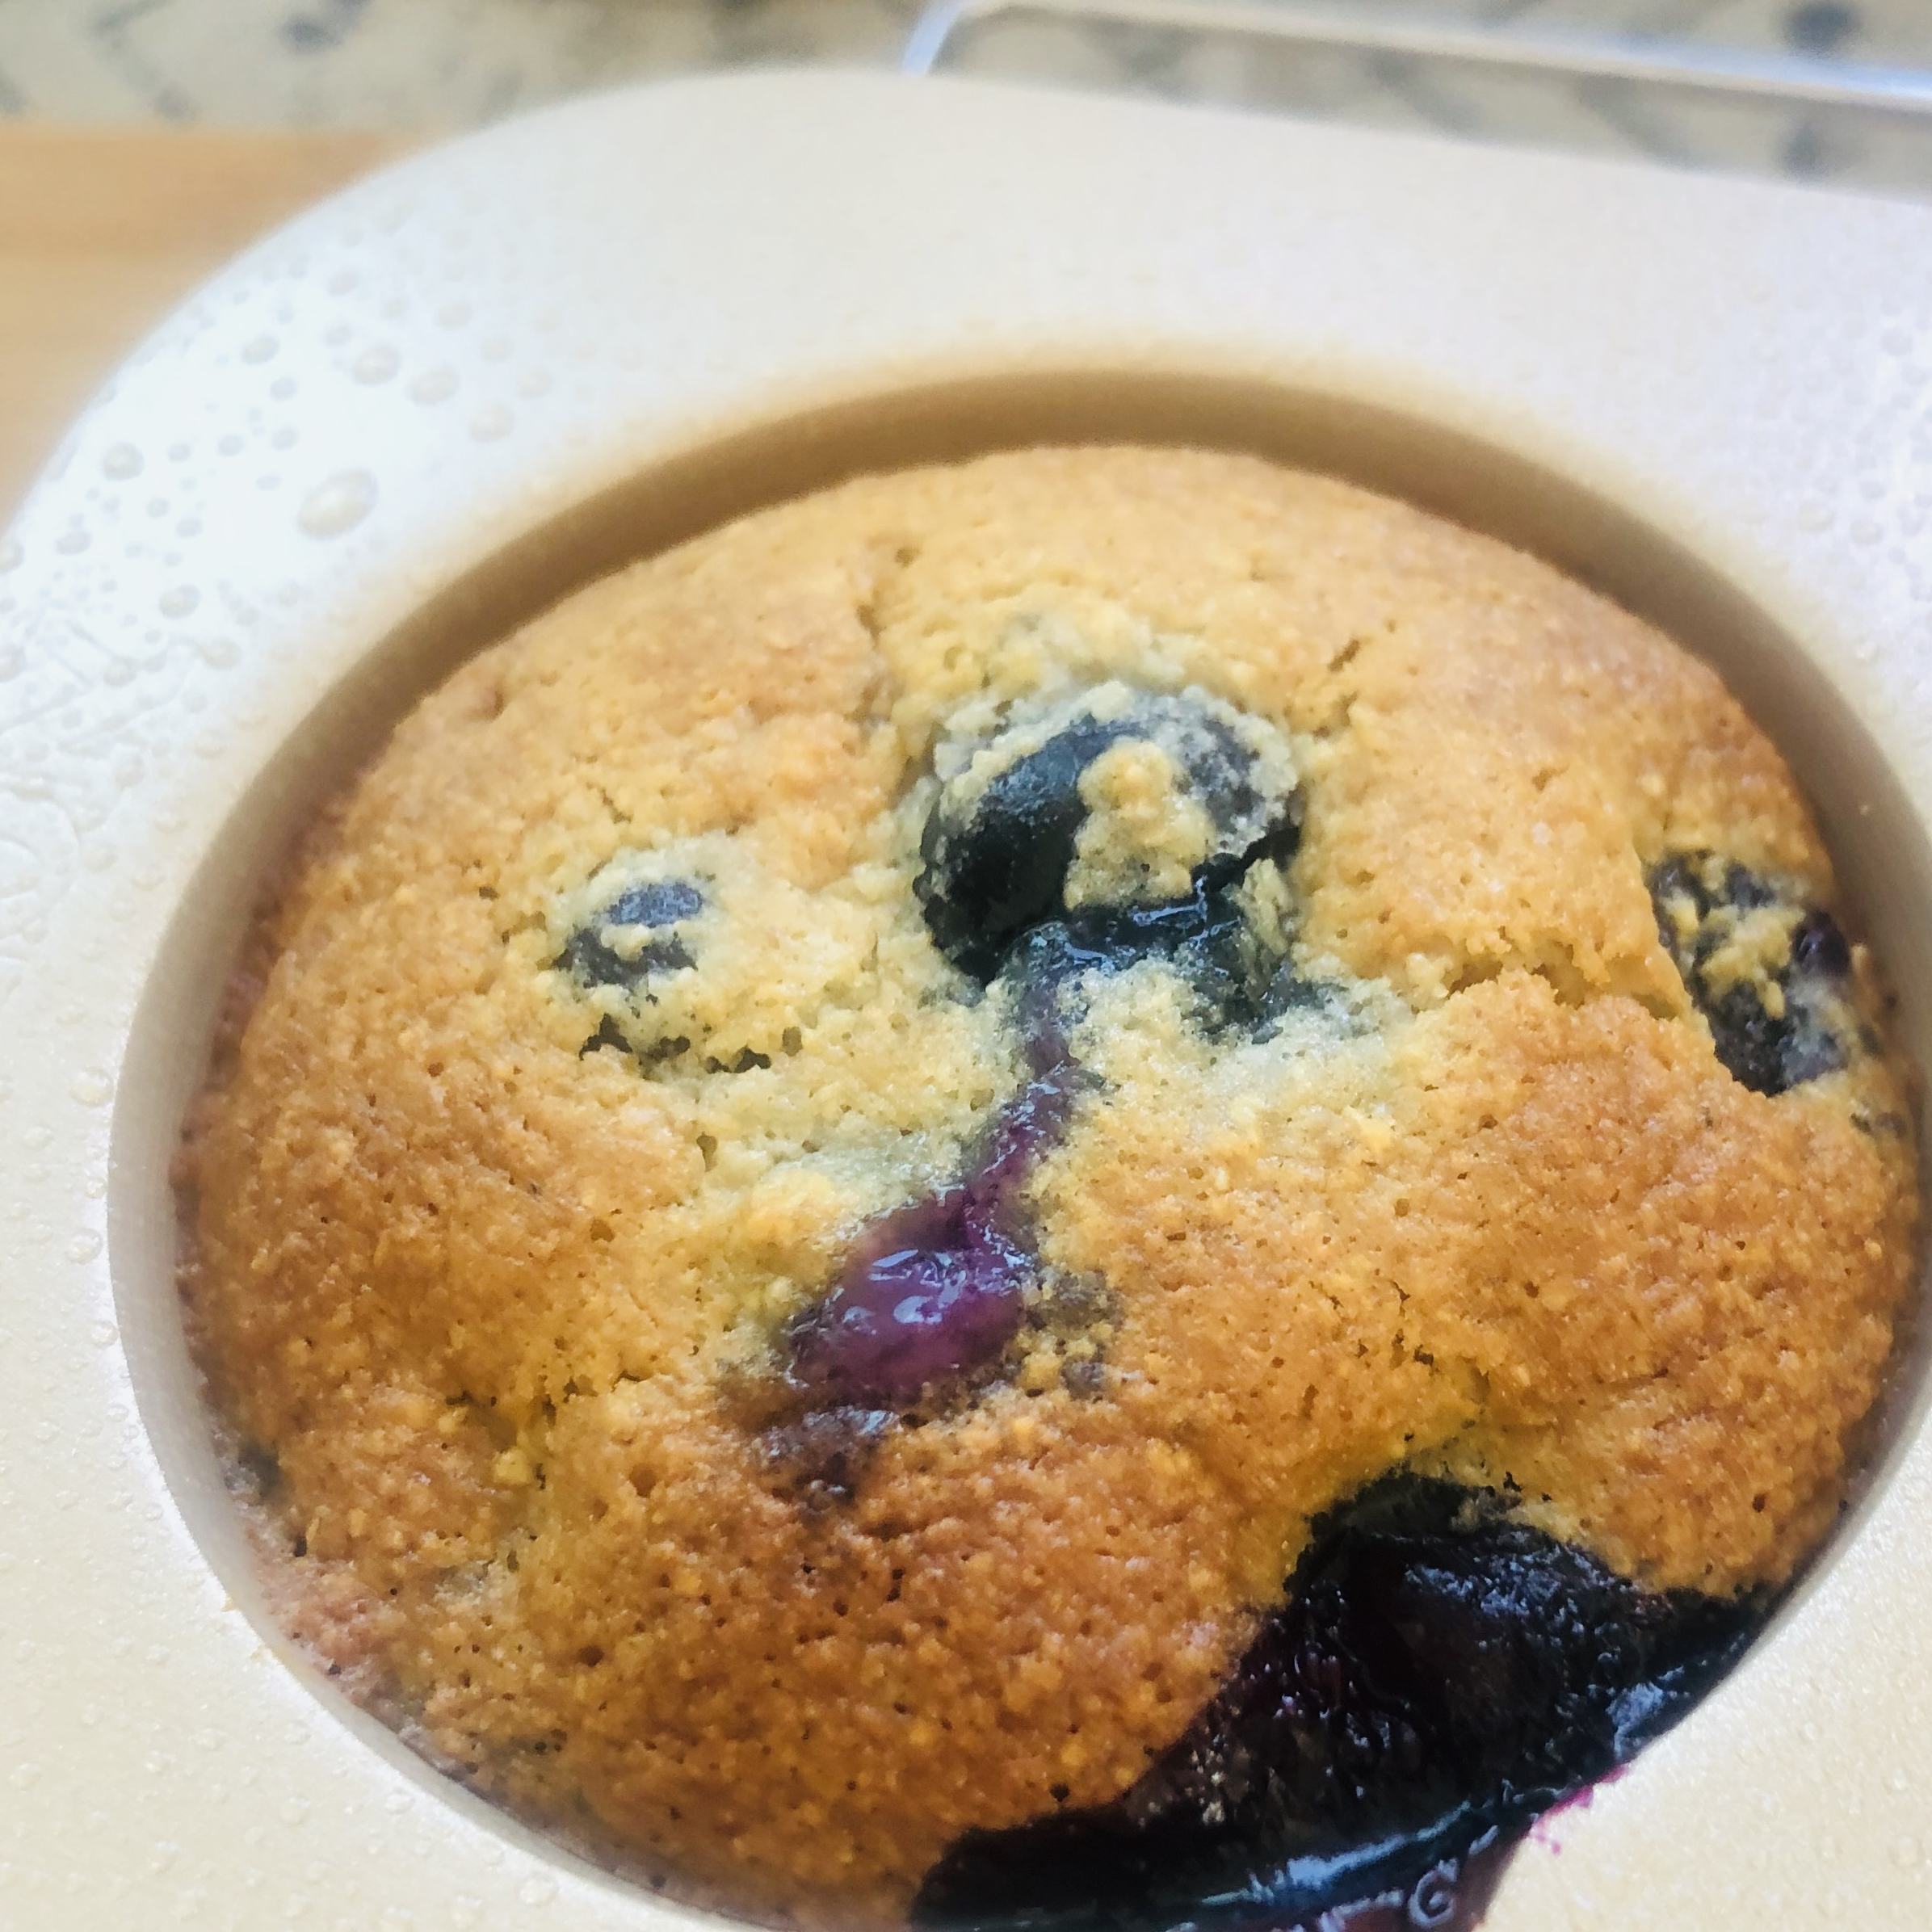
Looking for recipes that check the box for your wellness goals, while also satisfying picky eaters in your home? I’ve got a favorite one for you… delicious, moist blueberry protein muffins that are chock-full of good-for-you ingredients. In a sense, the muffin is the Trojan horse for healthy ingredients; for your kids… yet, also for you.
Foundation of a Healthy Muffin
Your choice of flour is a great way to ensure that you’re building a healthier muffin. I call these ‘Blueberry Protein Muffins’ because they contain almond flour and protein powder.
I’ll often call the flour source my ‘foundation’ of a baking recipe. This recipe uses two cups of foundational dry ingredients: oat flour, almond flour, and protein powder. You can try your own blend of foundational ingredients based on your needs. It can be 100% oat flour or whole wheat flour. Or, any blend that you like. I choose oat, almond, and protein powder because I like the comforting effects of oats, with the protein from the other ingredients.
Blueberry Protein Muffin Flavor Tweaks
Blueberries, chia and flax are the healthy heros that I choose to put in these muffins. Yet, you can get creative with your own ideas. Raspberries and dark chocolate would be delicious. Dark chocolate, dried cherries and walnuts is also yum.Basically, as long as you keep the ratios similar, you can swap-out whatever sounds best to you. If you or your kiddos have a particular favorite, it’s a great way to lure picky eaters into trying a new recipe.
Simplify the Baking Process
I’ll have to admit that I’m not traditionally a big baker. I LOVE cooking, but the precise measurement requirements in baking have always kept me at bay. Now, if I find a recipe I like, I’ll batch-prepare a bunch of dry ingredients of these blueberry protein muffins (or, really any baking recipe) into mason jars.
Each jar includes the dry ingredients for one batch. Then, when you’re ready to bake, simply mix-up the wet ingredients and incorporate it into a bowl with the dry stuff from the mason jar. Somehow, that just makes the whole process a bit more approachable, which is a good thing!
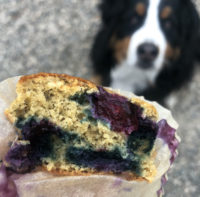
I hope you enjoy these muffins as much as we do. I would love to hear from you if you try them out. Feel free to comment here, or tag me on Instagram (@nichole_banducci).xoxo
1/2 cup IsaPro Vanilla whey protein powder (about 1.5 scoops)
1/4 cup sugar (regular or coconut)
1 tbsp chia seeds
1 tbsp ground flax seeds
1 tsp cinnamon
2 tsp baking powder
1/2 tsp baking soda
1 cup fresh blueberries (fold in after everything is mixed together)
Wet Ingredients
1 cup milk (your choice of type)
2 eggs
1 tbsp olive oil
1 tsp vanilla
Instructions
Preheat the oven to 375℉
Line your muffin tin with liners (I like parchment paper liners… no need for non-stick spray)
Combine all of the Dry Ingredients (with the exception of fresh blueberries) into a medium bowl, mix by hand.
Combine all of the Wet Ingredients into a separate small bowl, wisk to incorporate.
Add the wet ingredients to the dry ingredients, stirring till combined.
Fold in the fresh blueberries.
Fill your muffin tin. (I like using an ice cream scoop to ensure they are evenly filled… I often just put one scoop in each, as my kids like smaller muffins)
Bake at 375℉ for 20 minutes, or until a toothpick inserted in the muffin comes our clean.
Remove the muffins from the tin and cool on a rack. You can refrigerate any leftover muffins for up to 5 days. Or, store muffins on your counter in an airtight container for up to 48 hours (depending on how hot your kitchen gets)
Notes
Oat Flour: You can make your own by putting dry, raw oats into a blender. I like Bob’s Red Mill Gluten Free.
Protein Powder: Please feel free to substitute your favorite powder. This recipe uses about 64 grams of powder. IsaPro is by Isagenix.
Almond Flour: If you choose, you can easily increase almond flour to 1 cup and remove the protein powder.
Chia Seeds: Provides added protein, fiber and healthy omegas.
Ground Flax Seeds: Provides fiber and healthy omegas.